
Every single year we buy one, to two or three blow up/plastic swimming pools. Last year three popped. I felt TERRIBLE about putting those in a landfill. And they always got disgusting so fast. If you don’t have an in-ground swimming pool summertime swimming pools can become a bummer pretty quick.
One early morning I was feeding Nolan scrolling instagram and came across these #stocktankpools. I had seen them before but truly not given them much thought. This morning I decided to. Before 6am I had already sent Nick 7 different pools and links to everything we needed ;) I was worried it was going to take much convincing, but to my surprise he was onboard right away! With most pools being closed, and COVID-19 still a very real threat, we thought what better time for this at home pool to keep us busy all summer.

I want to dive in and tell you what all we did!!
So this is NOT going to be a step by step blog. However I am hoping I can give you enough information to get you started!
We purchased our 8ft tank from Tractor Supply Co. This one!
I have since heard that people are having trouble finding them. I hope you are able to!
We bought our filter pump on Amazon. This Intex Pump found in the “home decor” section of my amazon list!
Everything else we got from @shoptheswimclub on Instagram! She has put together bundles of “everything you need but the tank and the pump!” Honestly, getting all the extras as the “bundles” shown below was amazing. We didn’t have to chase around each of these items on the internet. We literally bought the tank (we did haul it home on our trailer!) and ordered the pump on Amazon, ordered her Installation Bundle and Maintenance Bundle and had everything we needed! We also have pool shock and chlorine water testing strips to make sure we are keeping the pool fresh and clean.

We have done MANY DIY projects over the years. You really never know how they are going to go. Typically it involves 75 trips to Lowes and double the time you anticipated. I have to say guys, this went SO EASY. Now, if you’ve never picked up a drill or caulk gun in your life it may be a little trickier. But this project went so simply for us. We were slightly shocked! And wondered why we hadn’t done it sooner.
First we drilled the holes in the tank. I was nervous because this is really a one time shot. Thankfully all went well, the hole saw was the perfect size for the filter pump hoses, we were good to go.
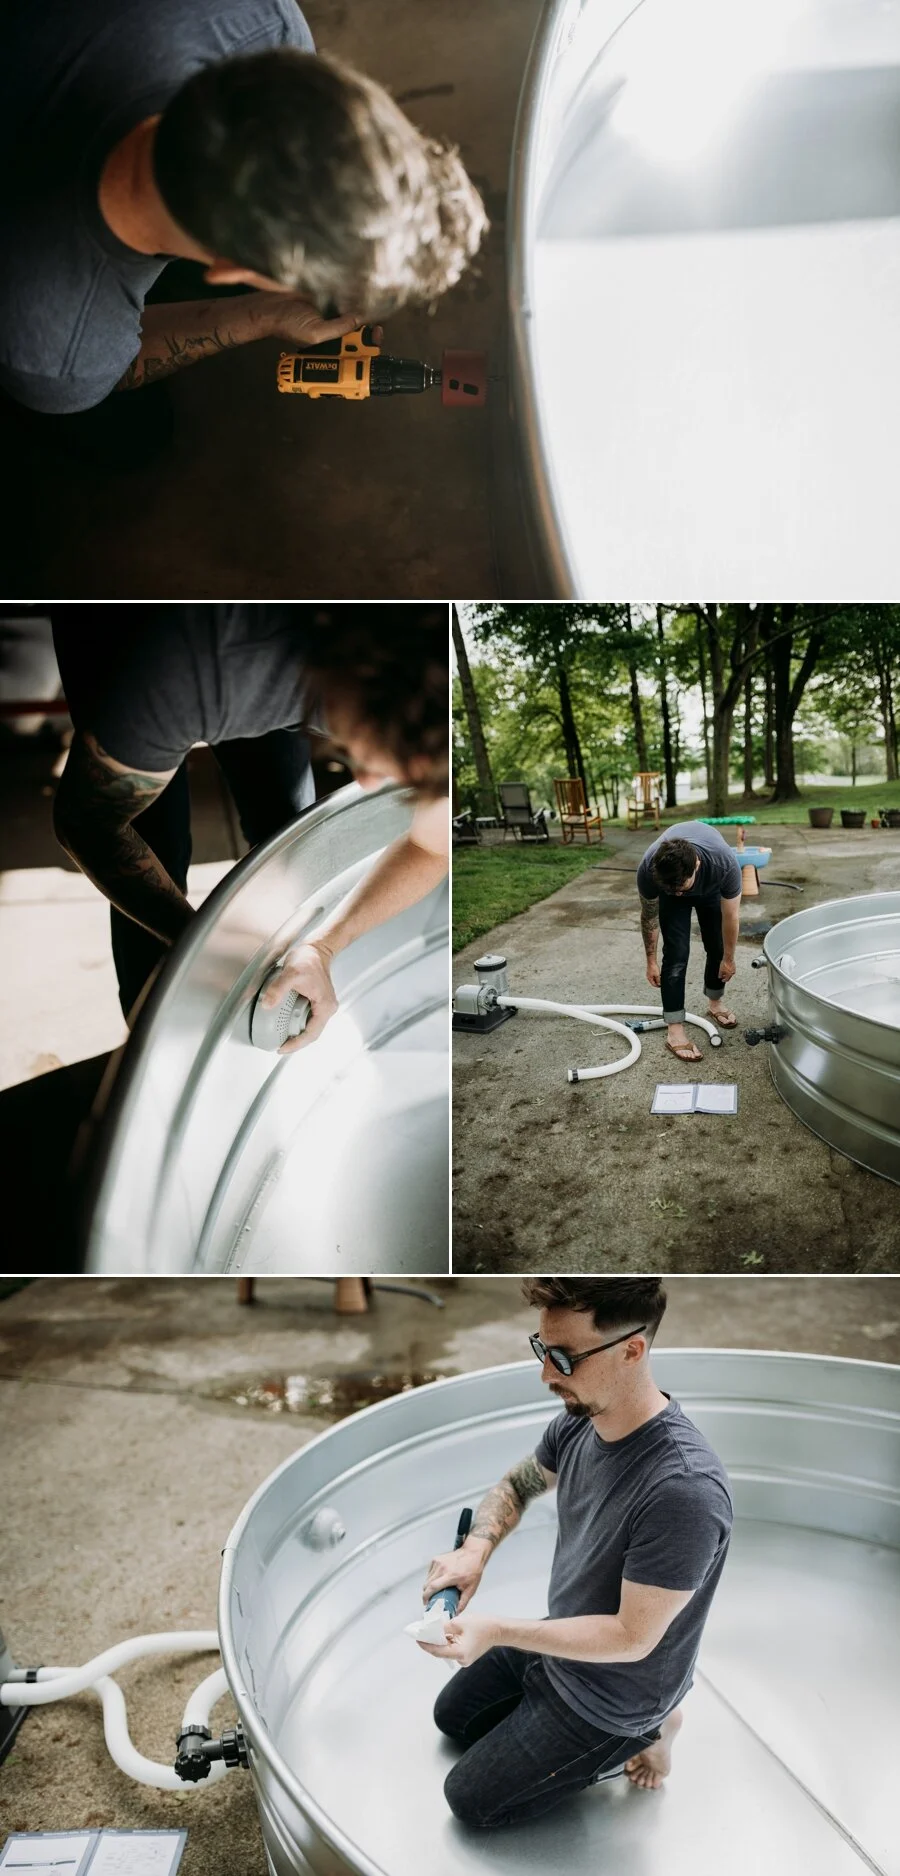
We then read the instructions that came with the pump. We had to use the plunger valves that came in our bundles as well. This step was very simple as well.
Next you need to seal around the intake/blower so you don’t have any leaks. We applied one really good coat of silicone and smoothed it. Waited 3 hours and did a second coat. Then we waited 24 hours for it to dry completely before we filled the tank with water. We had zero leaks, hooray!


So, the first weekend we had the pool, I have to say it was not really so great for just dipping your feet in. The kids hopped inside and had a blast, but if the adults just wanted to sit on the edge it just wasn’t comfortable. We sat on stools the first weekend but I knew we needed a deck! So I put Porter, Nick & my dad to work and they built this deck that 1 hides the pump and 2 is the PERFECT ledge for 3+ adults to sit on with their feet dipped and a cocktail in hand. Best part we had all of this wood in our garage and pulled this deck together in a couple of hours! It made all the difference in our comfort level. We are still hoping to add steps to the one side so the kids and walk up and jump in on their own.

Before we dove into this project we did do a lot of research. We read several blogs, watched youtube videos, searched google and Instagram. I saw some ADORABLE painted tanks, fell in love. But then I read many reviews on paint chipping and clogging the filter, scratches, trouble covering, etc, we decided to keep it natural. I want it cute, absolutely, but I also want it to function with as little maintenance as possible! There are some tutorials out there on how to paint them but truthfully we never found someone we felt really did it right with no snags so we decided to play it safe!

I’ve gotten so many questions of: “So did you actually do a pump? Is the water chlorinated?”
The answer is YES. These tanks and 700+ gallons. Not only does it take forever to fill up, forever to drain, it would get disgusting and be full of bacteria if you didn’t keep the water moving and clean. We’ve only shocked the pool twice so far, we use the test strips every time before we swim to make sure the water is clean and safe!
We do skim it a few times each time we use it to keep out grass, leaves, and the inevitable dirt that toddler feet drag in. Overall it has been really easy to maintain!


We’ve had the pool almost 4 weeks now and it has kept us so busy. Porter is having a blast. And so is our dog Jude haha. If you’re stuck at home with kids all Summer having something fun to do is such a weight-lift. It has been an absolute blast for us so far. I would totally say it has been worth it!
I have loaded videos to my story highlights on my Instagram with a little more info if you’d like to see a little more of the process! I hope this answered a lot of the questions you have all been asking!! If you decide to get one be sure to tag me I would love to see them!!
Happy Summer!